

Your trusty wood chipper isn’t cutting like it used to, leaving ragged edges and struggling to process branches. Dull blades are often the culprit, costing you valuable time and efficiency while putting unnecessary strain on your machine.
Sharpening wood chipper blades involves carefully removing them from the machine, using a grinding wheel or professional sharpening service to restore their keen edge at the correct angle, and then re-installing and balancing them properly, ensuring safety throughout the process.
As a manufacturer who sees countless machines in the field, I can tell you that blade maintenance is the secret to a long-lasting, efficient wood chipper. Neglecting your blades is like trying to chop wood with a butter knife; it simply won’t work well. Let’s dive into the specifics of how to bring that cutting edge back to life.
Why is it important to sharpen chipper blades?
You might be tempted to put off blade sharpening, telling yourself you’ll get to it later. But neglecting this crucial maintenance can lead to frustrating problems, higher costs, and even machine damage. What’s the real cost of dull blades, and why should you prioritize sharpening?
Sharpening chipper blades is crucial because dull blades reduce cutting efficiency, increase fuel consumption, create poor quality chips, put undue strain on the chipper’s engine, and can even pose safety risks due to kickback and increased jamming.
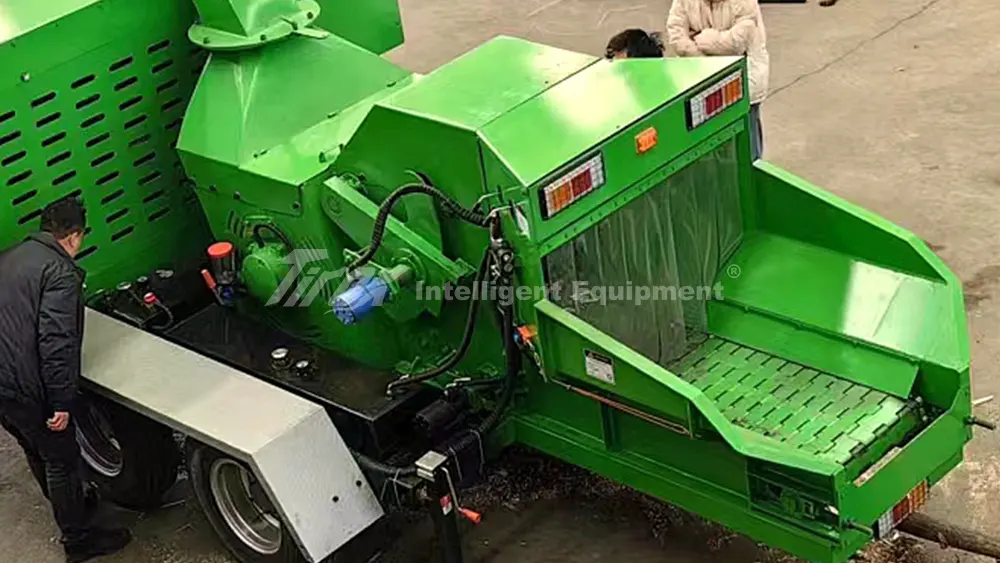
From my perspective at TIROX, maintaining blade sharpness is one of the most important things a customer can do for their machine. I’ve seen firsthand how a sharp blade transforms raw material into neat, uniform chips with ease. A dull blade, on the other hand, struggles. It tears and crushes material instead of cleanly cutting it. This means the engine has to work much harder to achieve the same result, leading to several negative consequences. Our machines, like the TIROX wood chipper, are built tough, but even the best steel needs maintenance. We design our blades using high-wear-resistant materials like H12 or 6652Si [21], which hold an edge well, but they still require periodic sharpening. A sharp blade works in harmony with the chipper’s intelligent feed system [1] to process material smoothly, reducing load on the engine and extending the machine’s overall lifespan.
The Hidden Costs of Dull Blades
Operating with dull blades has several significant drawbacks:
- Reduced Efficiency and Increased Fuel Consumption: When blades are dull, the chipper no longer cuts cleanly. Instead, it tears and pulverizes the wood. This requires significantly more power from the engine, causing it to burn more fuel to process the same amount of material. You’ll spend more money on fuel and get less work done.
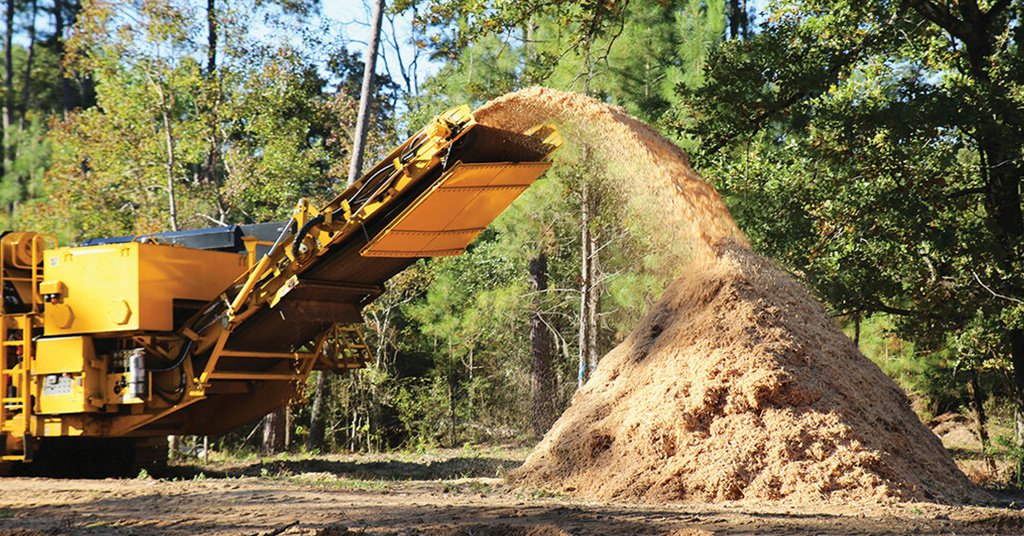
- Poor Chip Quality: Dull blades produce ragged, inconsistent chips, often with long strands or large, uneven pieces. If your end product needs uniform chips for mulch, compost, or biomass fuel [7], dull blades will severely compromise the quality.
- Increased Machine Strain and Wear: The added effort required from the engine to compensate for dull blades puts undue stress on all internal components. This includes the engine itself, belts, bearings, and hydraulic systems. This increased strain accelerates wear and tear, leading to more frequent breakdowns and costly repairs in the long run.
- Safety Hazards: Dull blades are more prone to jamming as material fails to clear the cutting chamber. These jams can lead to sudden kickback, where material is forcefully ejected back out the feed chute, creating a serious safety risk for the operator. Fatigue also increases as the operator struggles with a less effective machine.
- Blade Longevity: Ironically, neglecting to sharpen blades can shorten their overall life. When blades become too dull, they may chip or deform, making them impossible to sharpen correctly and necessitating a complete replacement rather than just re-sharpening. Proper, timely sharpening extends the usable life of your blades.
What tools do you need to sharpen chipper blades?
Ready to tackle those dull blades yourself? Before you start, gathering the right tools is essential to ensure a safe and effective sharpening process. This isn’t a job for just any old toolbox. What exactly will you need for the job, and why is each tool important?
To sharpen wood chipper blades safely and effectively, you will primarily need appropriate personal protective equipment (PPE), a wrench set for careful blade removal, a suitable grinding wheel (such as a bench grinder with a proper jig or a specialized sharpener), a strong magnet or vice for secure blade holding, and potentially a micrometer for precise balancing.
In my many years of overseeing manufacturing and maintenance at TIROX, I’ve stressed the importance of having the right equipment for any task, especially blade maintenance. Trying to sharpen blades with inadequate tools is not only ineffective but also dangerous. Think of it like a surgeon preparing for an operation; they wouldn’t use a butter knife! Getting the right tools together ensures precision and safety, which are paramount when dealing with sharp objects and powerful machinery. This preparation step can save you hours of frustration and prevent potential injuries.
Essential Tools for Blade Sharpening
Here’s a breakdown of the tools you’ll need:
- Personal Protective Equipment (PPE): Safety should always come first.
- Heavy-duty gloves: To protect your hands from sharp edges and potential cuts.
- Safety glasses/face shield: Essential for protecting your eyes from sparks, metal fragments, and grinding dust.
- Hearing protection: Grinders can be loud, so earplugs or earmuffs are important.
- Wrench Set: You’ll need the correct size wrenches to safely remove the bolts that secure the chipper blades. Ensure they are in good condition to avoid stripping bolt heads. Always consult your chipper’s manual for specific bolt sizes and removal procedures.
- Bench Grinder with a Jig or Specialized Sharpener: This is the primary tool for sharpening.
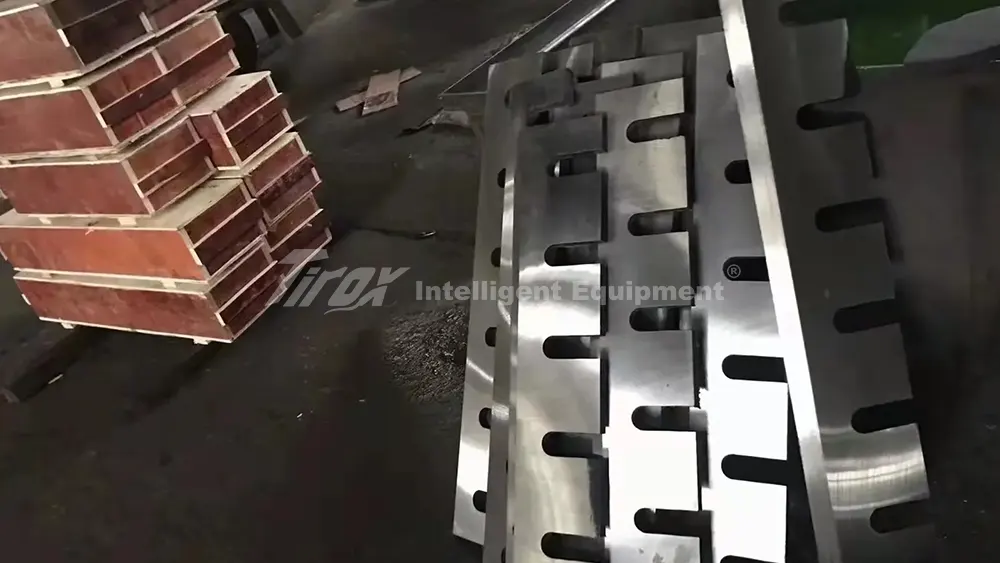
- Bench Grinder: A sturdy bench grinder with a fine-grit grinding wheel is suitable for most blades. You will need a blade sharpening jig or fixture to hold the blade at the correct angle consistently. This is critical for achieving a uniform and effective edge.
- Specialized Blade Sharpener: For those who frequently sharpen chipper blades or prefer a more precise, automated approach, there are dedicated chipper blade sharpening machines. These typically hold the blade securely and grind at the exact factory angle.
- Strong Magnet or Vice: You’ll need a way to hold the blade firmly and safely while you are grinding. A strong magnetic base or a heavy-duty machinist’s vice works well. This prevents the blade from slipping, which could lead to an uneven grind or injury.
- Marker or Layout Fluid: To mark the cutting edge before grinding, helping you ensure you’re removing material evenly across the entire edge.
- Micrometer or Digital Caliper (Optional but Recommended): After sharpening, especially if you have multiple blades on a single rotor, it’s crucial to balance them. A micrometer helps measure the thickness and weight of each blade precisely to ensure uniform weight distribution. Unbalanced blades can cause severe vibration and damage to the chipper’s rotor and bearings. You can find more information about maintaining tools in online forums dedicated to woodworking and heavy equipment.
How do you safely remove chipper blades?
The thought of reaching into a machine with sharp blades can be daunting, and rightly so. Safety is paramount when handling chipper blades. You need a clear, step-by-step process to ensure that you can remove them without risk of injury or further machine damage.
Safely removing chipper blades requires strictly adhering to safety protocols, including completely disconnecting the chipper’s power source, wearing appropriate PPE, and carefully following the manufacturer’s instructions for accessing and unbolting the blades from the cutting mechanism.
At TIROX, safety is engineered into every machine we build. However, operator actions are just as critical. I always tell our customers that the most dangerous part of maintaining a chipper is often the blades themselves. They are incredibly sharp and heavy. My team emphasizes the importance of following every safety instruction in the manual. Taking shortcuts when removing blades can lead to serious injury or damage to the chipper’s rotor. Before even touching the machine, always confirm that it cannot start accidentally. This is not just a recommendation; it is a critical safety measure. Visit our blog for more safety tips related to wood chippers: https://tiroxcorp.com/blog/.
Step-by-Step Safe Blade Removal
Follow these steps carefully to ensure a safe blade removal:
- 1. Disconnect All Power: This is the absolute first step. For gasoline or diesel chippers, remove the spark plug wire and disconnect the battery. For electric chippers, unplug the machine from its power source and ensure the circuit breaker is off and locked out. Never assume the machine is off; always verify.
- 2. Allow Components to Cool: If the chipper has recently been in use, allow the engine and cutting mechanism to cool down completely. Metal parts can become very hot and cause burns.
- 3. Engage Safety Locks (if applicable): Some chippers have safety pins or locks to prevent the rotor from turning while you are working on it. Engage these mechanisms as per your owner’s manual.
- 4. Access the Cutting Chamber: This usually involves opening the chipper’s housing or chute. Ensure you have clear access to the blades and their mounting bolts.
- 5. Wear PPE: Put on your heavy-duty gloves and safety glasses. Even when dull, these blades are extremely sharp and can cause severe cuts.
- 6. Inspect the Blades and Rotor: Before removal, take note of how the blades are positioned and how many shims (thin metal spacers) are behind each blade. It’s often helpful to take pictures for reference.
- 7. Loosen and Remove Bolts: Using the correct size wrench, carefully loosen the bolts securing each blade. Blades are often held by several bolts. Loosen them evenly to avoid warping the blade. Once all bolts are removed, carefully lift the blade from its mounting.
- 8. Handle with Care: Blades are heavy and awkward. Use both hands or a lifting aid if necessary. Place them immediately in a secure, flat location where they won’t fall or cause injury. Never stack blades directly on top of each other without protection between them.
- 9. Note Shim Placement: Keep the shims with their respective blades. These shims are critical for maintaining the correct blade height and clearance. Losing or mixing them up will affect the chipper’s performance when you reinstall the sharpened blades.
What is the proper way to sharpen chipper blades?
You’ve safely removed the blades, and now comes the critical part: restoring that razor-sharp edge. Improper sharpening can do more harm than good, affecting cutting performance and even blade longevity. So, what’s the correct technique to bring your blades back to life?
The proper way to sharpen chipper blades involves securely mounting them in a jig to maintain the factory-set grinding angle, gradually removing a minimal amount of material from the beveled edge with a grinding wheel until a keen, burr-free edge is achieved, and then ensuring consistent blade weight for balance.
As an engineer at TIROX, I understand the precision required in manufacturing blades. That precision must be maintained during sharpening. It’s not just about making the blade “sharp”; it’s about maintaining the original geometry and balance. I’ve seen blades ruined by improper grinding – angles changed, too much material removed, or uneven sharpening. This leads to imbalanced rotors and poor chipping. Our blades are hardened for durability [21], which means they will hold an edge longer, but also require careful grinding when sharpening. Grinding too aggressively can overheat the steel, damaging its temper.
The Sharpening Process Explained
Here’s how to sharpen chipper blades effectively:
- 1. Secure the Blade: This is paramount. Clamp the blade securely in a specialized sharpening jig or a heavy-duty vice. The jig is crucial for maintaining the correct grinding angle consistently across the entire cutting edge. Your chipper’s manual will specify the correct angle (e.g., 30 or 45 degrees).
- 2. Prepare the Grinder: Ensure your bench grinder has a good quality, fine-grit grinding wheel. If using a specialized sharpener, follow its specific instructions. Make sure the work rest is adjusted correctly for stability.
- 3. Grind the Beveled Edge: Start grinding by gently bringing the beveled edge of the blade against the spinning grinding wheel. Move the blade slowly and evenly across the wheel, applying light pressure. The goal is to remove as little material as possible, just enough to create a new, sharp edge.
- Cooling: Grind in short passes (a few seconds at a time) to prevent the blade from overheating. Overheating can change the steel’s temper, making it brittle and prone to chipping. Use a can of water to dip the blade in frequently to keep it cool.
- Consistency: Maintain the correct grinding angle throughout the process. Grind all blades equally to remove roughly the same amount of material.
- 4. Remove the Burr: As you grind, a small burr (a thin, wire-like edge) will form on the back side of the blade. This burr indicates you’ve reached the cutting edge. Carefully remove this burr by making a very light pass on the flat side of the blade, or by lightly running a sharpening stone along it.
- 5. Inspect the Edge: Once sharpened, carefully inspect the blade. It should have a consistent, keen edge along its entire length. It should look bright and clean, free of nicks or dull spots.
- 6. Weigh and Balance Blades: This step is crucial, especially for chippers with multiple blades. Use a precise scale (like a digital kitchen scale or a dedicated blade balancing tool) to weigh each sharpened blade. It is essential that all blades in a set weigh exactly the same. Even a small difference in weight can cause severe vibration in the chipper’s rotor, leading to bearing failure and other damage. If a blade is slightly heavier, you may need to carefully remove a tiny bit more material from its back edge until it matches the lightest blade. For more details on maintaining industrial blades, you might consult a manufacturing forum.
How do you safely reinstall chipper blades?
You’ve meticulously sharpened your blades, and they are now gleaming and razor-sharp. The final step is crucial: safely reinstalling them into your chipper. This isn’t just about bolting them back in; it’s about ensuring proper alignment and balance for optimal and safe operation.
Safely reinstalling chipper blades involves reversing the removal process while ensuring all safety measures remain in place, carefully positioning each blade with its corresponding shims, tightening all mounting bolts to the manufacturer’s specified torque, and verifying the rotor’s balance before operating the machine.
In my years at TIROX, I’ve learned that precision during reinstallation is as important as the sharpening itself. A perfectly sharpened blade can become ineffective or even dangerous if not reinstalled correctly. Misaligned or unbalanced blades can cause excessive vibration, which not only damages the chipper but also creates an unsafe working environment. Just as we ensure every component fits perfectly in our factory, you must ensure your blades are perfectly placed in your chipper. Proper reinstallation will ensure your wood recycling equipment performs as it should.
Steps for Safe Blade Reinstallation
Follow these steps carefully to ensure a safe and effective reinstallation:
- 1. Maintain Safety Protocols: Ensure the chipper’s power source remains disconnected, and all safety locks are engaged. Continue to wear your heavy-duty gloves and safety glasses.
- 2. Clean the Mounting Area: Before installing, thoroughly clean the blade mounting surfaces on the rotor. Remove any wood debris, rust, or old shims. A clean surface ensures the blades sit flush.
- 3. Position the Blade and Shims: Carefully place the sharpened blade into its mounting slot. Ensure that you replace the exact same shims (or new ones of identical thickness) behind the blade as were removed earlier. These shims are crucial for setting the correct blade height and ensuring proper clearance for chipping. If you mixed them up, consult your manual for the correct shim configuration.
- 4. Insert and Hand-Tighten Bolts: Insert all the mounting bolts and hand-tighten them. Do not fully tighten them yet. This allows for minor adjustments if needed.
- 5. Check Blade Projection/Clearance (if applicable): Some chippers require you to check the blade’s projection (how far it extends from the rotor) or its clearance against the anvil. Use a feeler gauge or the specified tool from your manual to ensure it’s within the manufacturer’s tolerances. Adjust shims as necessary.
- 6. Torque Bolts to Specification: Using a torque wrench, tighten the mounting bolts in a crisscross pattern (like changing a tire) to the manufacturer’s specified torque settings. This ensures even pressure and prevents the bolts from loosening during operation. Never guess; consult your chipper’s manual for these critical values.
- 7. Verify Rotor Balance: After all blades are reinstalled and torqued, manually rotate the chipper’s rotor. It should spin smoothly and without excessive wobble or vibration. If there’s noticeable imbalance, recheck the blade weights and shim placement. Unbalanced blades will severely impact chipper performance and longevity.
- 8. Reassemble and Test: Once you’re satisfied with the installation, reassemble the chipper’s housing and reconnect all power sources. Before chipping actual material, run the chipper at idle for a few minutes and listen for any unusual noises or vibrations. If everything sounds normal, you’re ready to get back to work. For further troubleshooting or machine-specific advice, remember that our 24/7 after-sales support team is always available to help.
Conclusion
Sharpening wood chipper blades is essential for efficiency and safety. Always disconnect power, wear PPE, and follow the manufacturer’s instructions for removal, grinding at the correct angle, and proper, balanced reinstallation to prolong your chipper’s life.